Helium GPS
 ESP32_Helium_GPS
Building a prototype to send GPS location data to the Helium (Lora) network
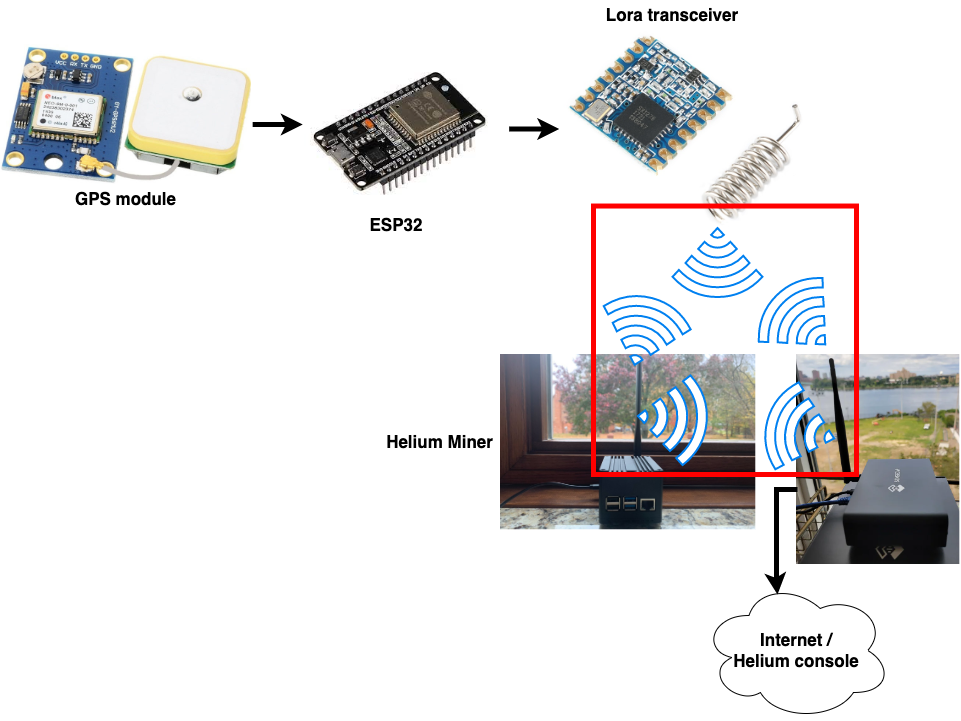
This project provides step-by-step instructions for building a prototype device that sends GPS location data to the Helium (Lora) network. The prototype utilises an ESP32 development board, a Lora RFM95W 915MHZ (SX1276) module, and a GPS module (GY-GPS6MV2). The instructions cover connecting the Lora and GPS modules to the ESP32 board, adding the device to the Helium network, and setting up a test/debug environment using pipedream.com. The file also includes images to assist in the building process.
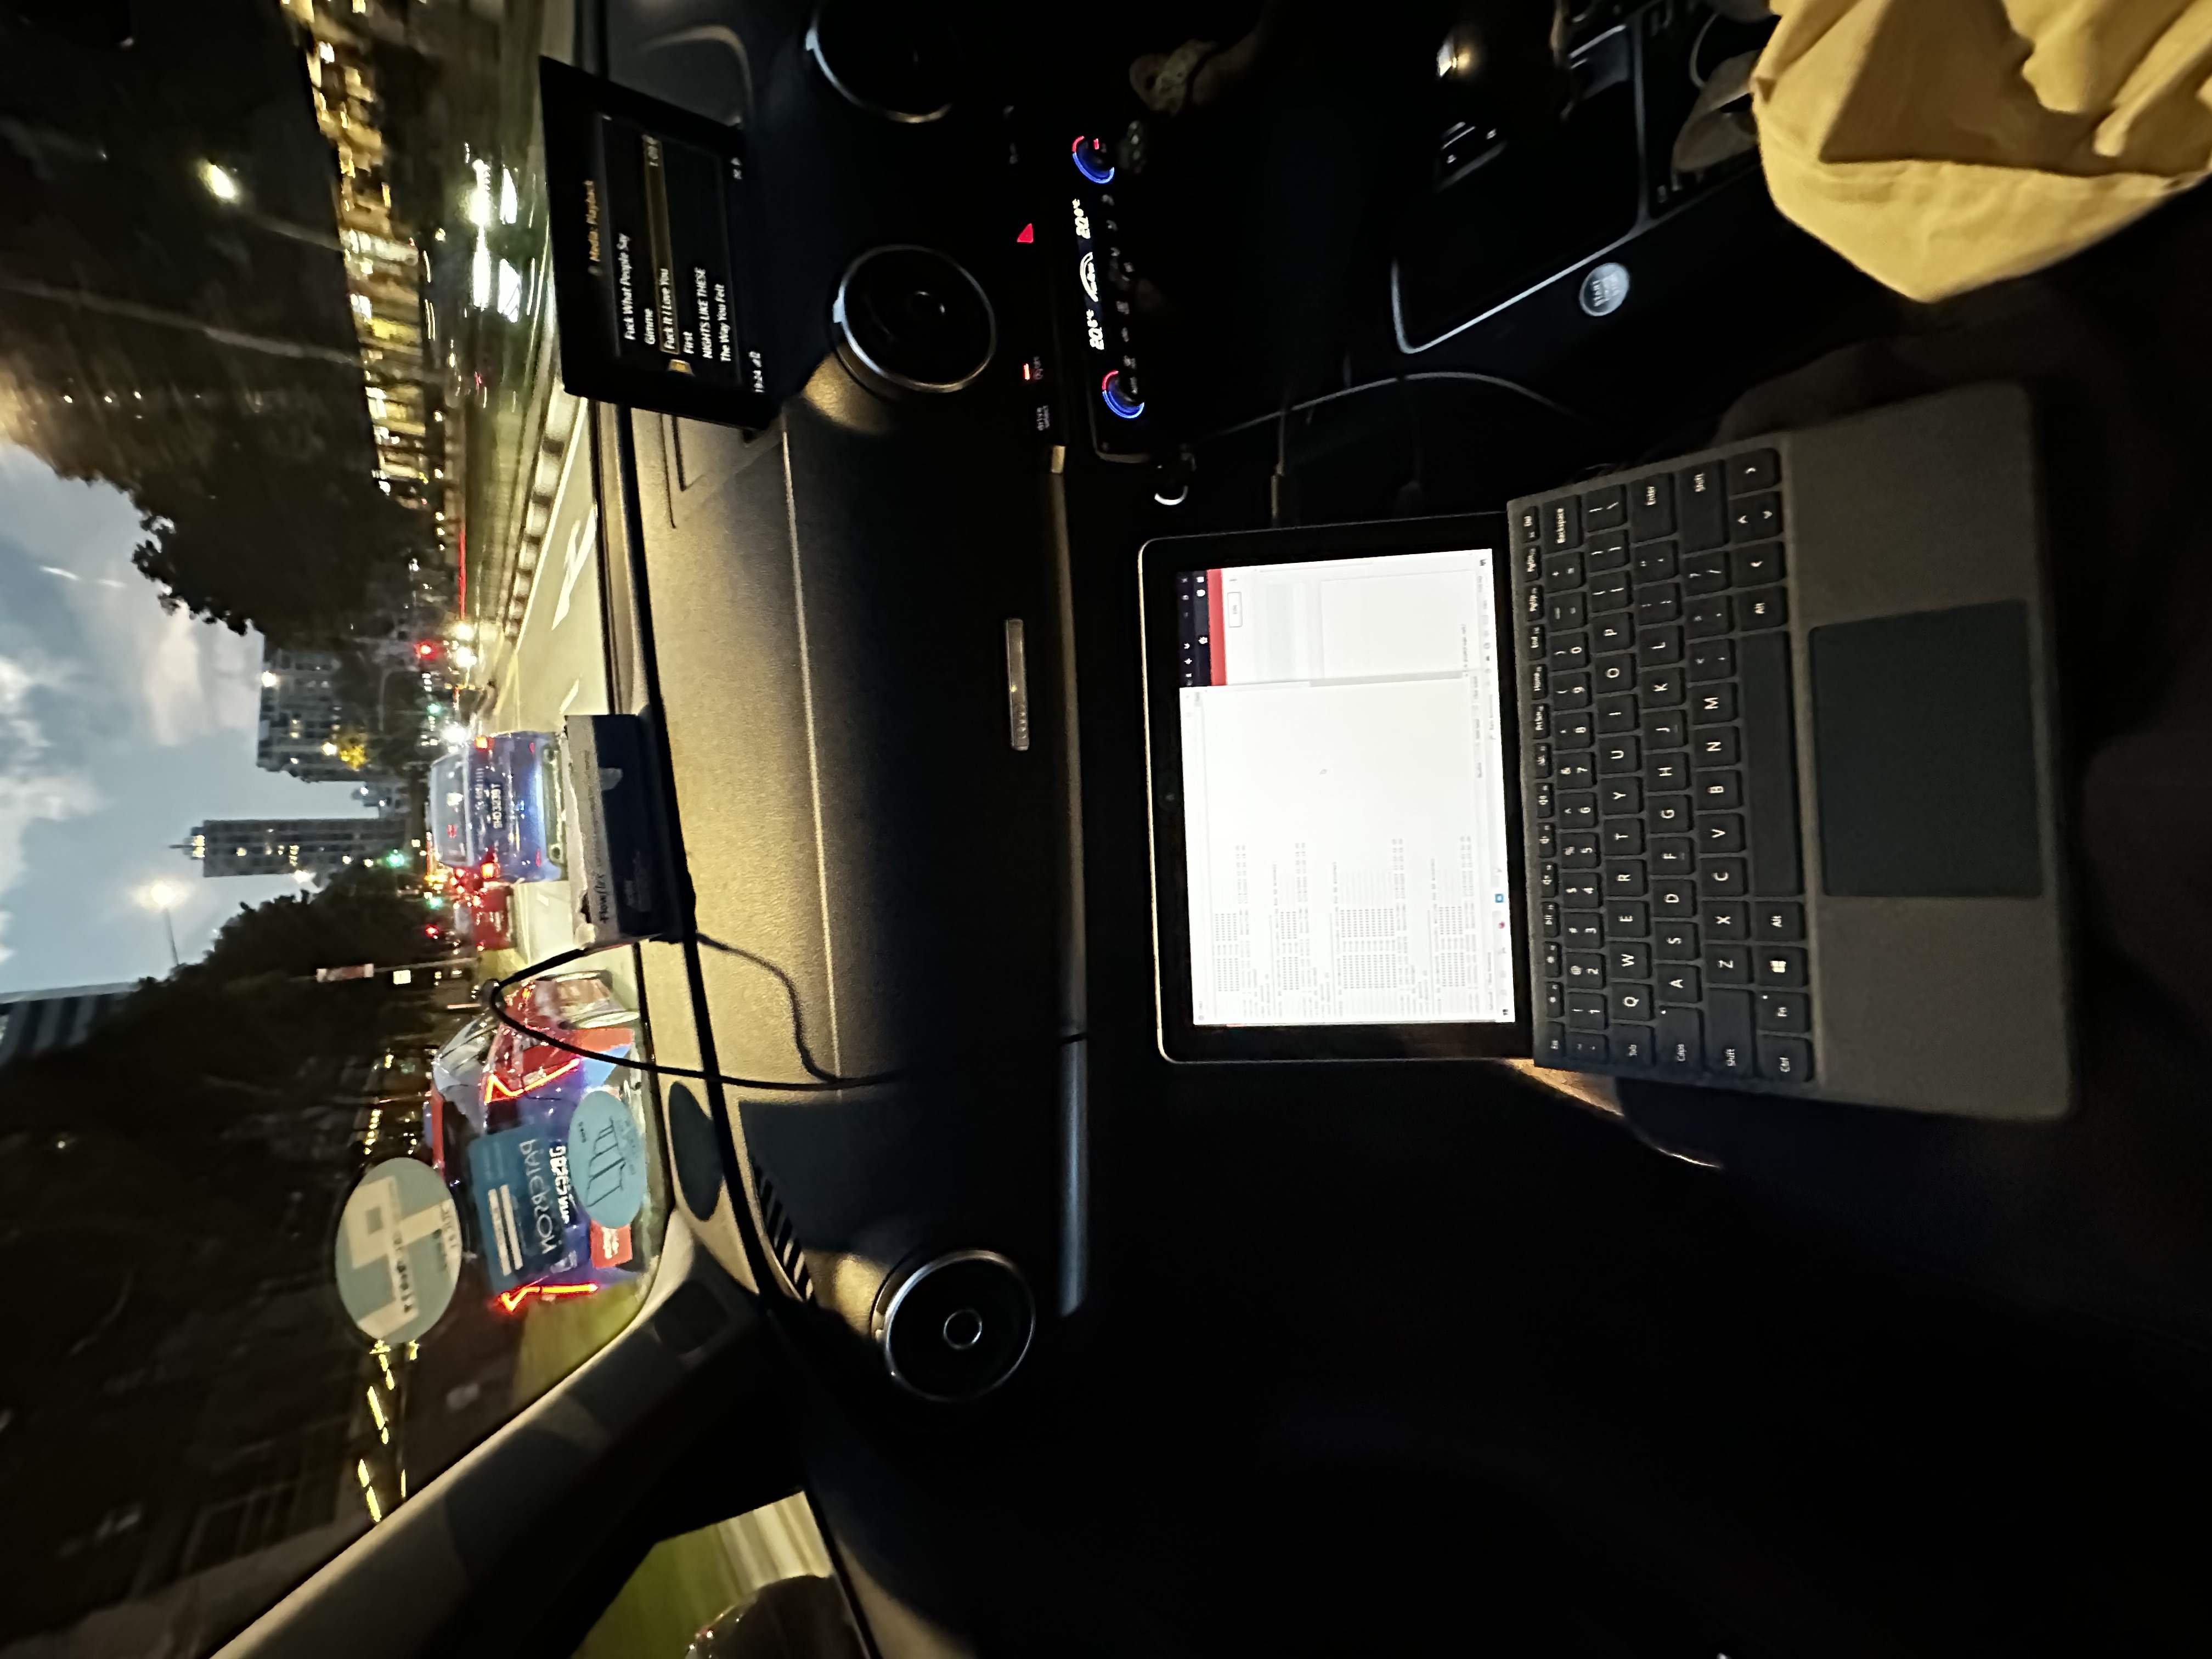
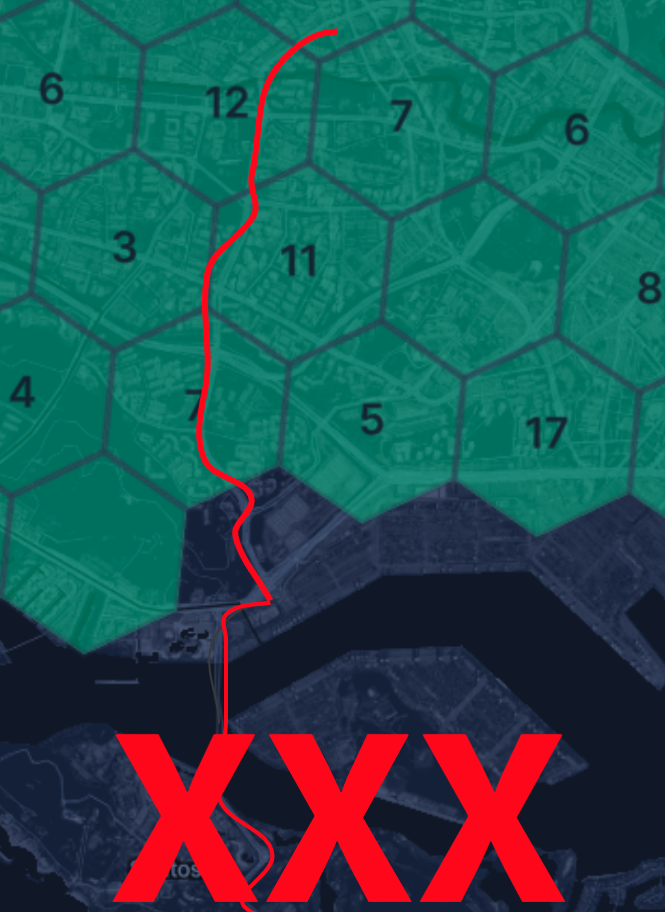
The GPS/Helium test drive though Singapore
| Helium GPS prototype | Connection test drive |
|---|---|
 |
 |
| Test drive successful transmits | Helium hotspot map(explorer.helium.com) |
|---|---|
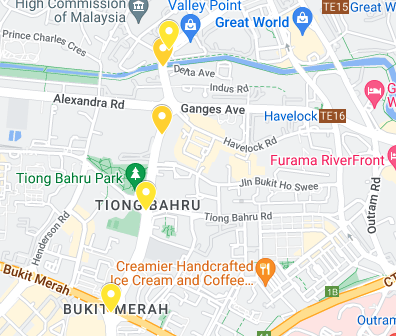 |
 |
How to use the code
Components
- Lora RFM95W 915MHZ (SX1276) - Make sure you have the correct board with frequency you need!
- ESP32 development board
- GPS module (GY - GPS6MV2)
Connect the lora module
| ESP32 | SX1276 |
|---|---|
| GPIO34 | DIO0 |
| GPIO35 | DIO1 |
| GPIO33 | DIO2 |
| GPIO23 | MOSI |
| GPIO18 | SCK |
| GPIO19 | MISO |
| GPIO4 | RESET/RST |
| GPIO5 | NSS |
| 3V3 | 3.3V |
| GND | GND |
Connect the GPS module
| ESP32 | GPS6MV2 |
|---|---|
| RX2 | TX |
| TX2 | RX |
| VIN(5V) | VCC |
| GND | GND |
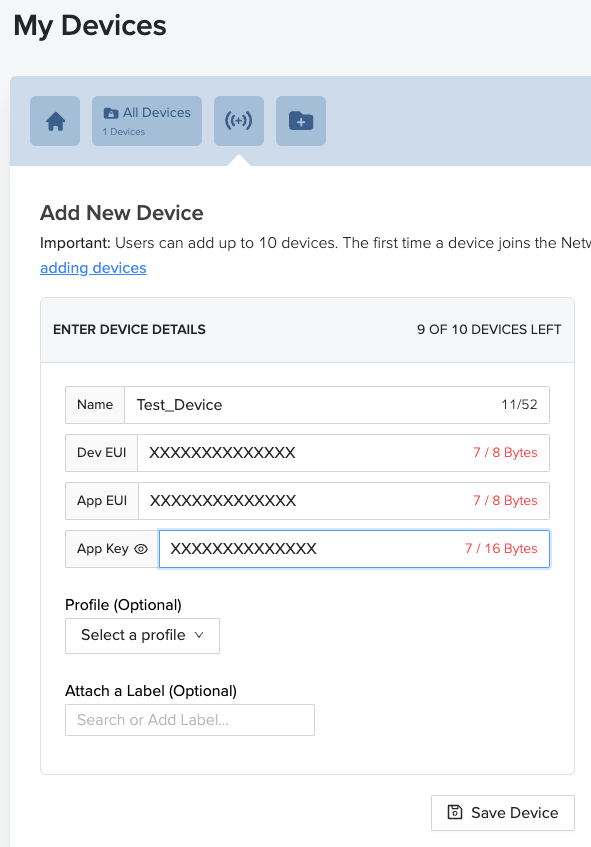
Add you device to the Helium network
Go to the Helium console (console.helium.com/devices) and add a new device (see below). You will need later the “Device EUI”, “App EUI” and “App Key”.
| Add a new device | Pending device creation |
|---|---|
 |
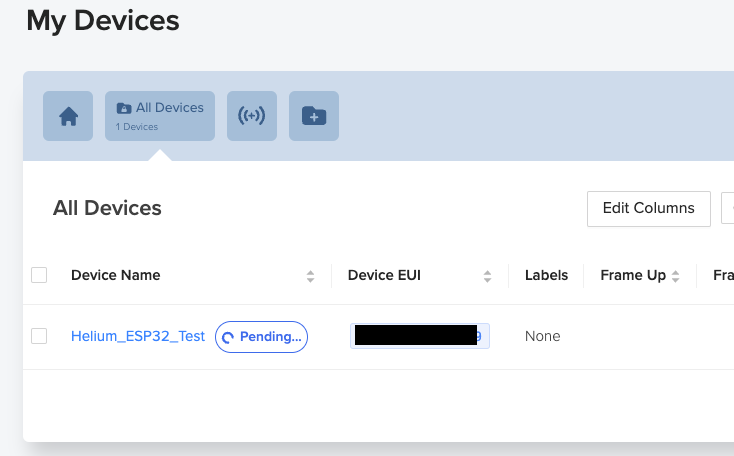 |
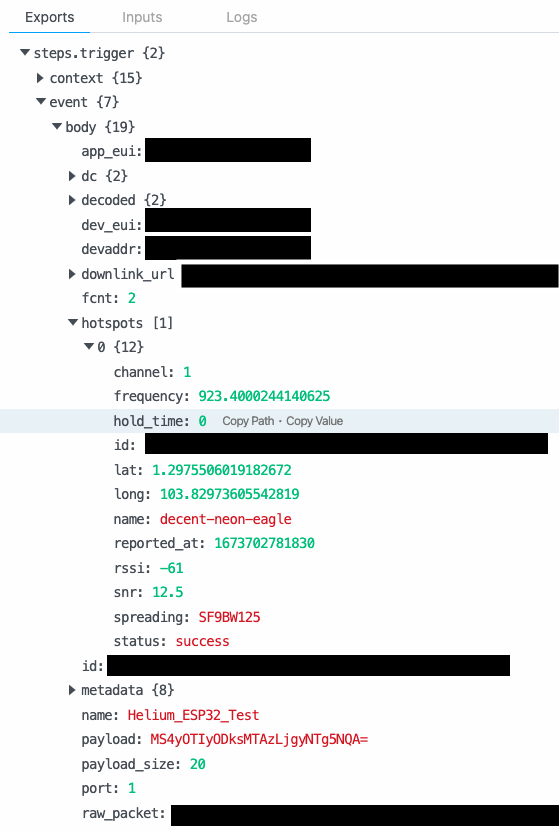
Set up your test/debug environment (Optional)
I used pipedream.com to receive, temporary store and retrieve the packages I sent it the Helium network. You can sign up (pipedream.com/auth/signup) and get the payload of you your packages (see below).
You will also need to add a new integration (console.helium.com/integrations/new) in the Helium console to add the pipedream endpoint as receiver of your messages. Furthermore you need to create a flow in the Helium console (console.helium.com/flows) which then instruct the Helium console to send the packages to pipedream (see below).
| Helium console flow (console.helium.com/flows) | pipedream.com |
|---|---|
 |
 |
Setting up the Arduino environment
- 1. Install "MCCI Arduino LoRaWAN LMIC library" (https://github.com/mcci-catena/arduino-lorawan/)
- 1.1 Go to Sketch > Include Library > Manage Libraries.
- 1.2 In the search bar, type in the name of the library you wish to install and click on the library in the search results.
- 1.3 Click on the "Install" button to install the library.
- 2. Change the "lmic_project_config.h" file
- 2.1 Go to "/libraries/MCCI_LoRaWAN_LMIC_library/project_config/lmic_project_config.h"
- 2.2 Add the lines below and comment or remove everything else
<li>3. Add your "Device EUI", "App EUI" and "App Key" to the "helium_crd.h" file.
<ul>
<li>2.1 "Device EUI" needs to be added as LSB (Little-endian). </li>
<li>2.2 "App EUI" also needs to be added as LSB.</li>
<li>2.3 But "App Key" needs to be added as MSB.</li>
</ul>
“lmic_project_config.h” file
#define CFG_as923 1
#define CFG_sx1276_radio 1
#define LMIC_LORAWAN_SPEC_VERSION LMIC_LORAWAN_SPEC_VERSION_1_0_3
Configuration are meant to be used for the Singapore/AS923 frequency.
“helium_crd.h” file. Example: APPEUI from the Helium console “123456890abcdef”
static const u1_t PROGMEM APPEUI[8] = { 0xEF,0xCD,0xAB,0x90,0x78,0x56,0x34,0x12};
What if it does not work?
- Make to have the correct module with the right frequency!
- Make sure you added “Device EUI”, “App EUI” and “App Key” in the right order and you do not have any mistakes in it.
- Make sure you are close to (ideally to several) Helium hotspots (explorer.helium.com).
- Check your cabling!
- Helium/Lora is very time sensitive protocol (based on the internet) make sure you do not delay or block the “os_runloop_once()” function for too long. The function needs to be called constantly my experience.
- Your code does not compile right at the beginning after installing the library? Make sure to close and reopen the Arduino IDE.
- Always get “no JoinAccept”? Can mean many things: No hotspot close by, wrong “Device EUI”, “App EUI” or “App Key, cable issue, …
What to do next?
- Improve the software and some timing issues.
- Add more debug messages to understand issues better.
- Build a prototype which can be used for an extended time e.g. temperature sensor in a remote area.
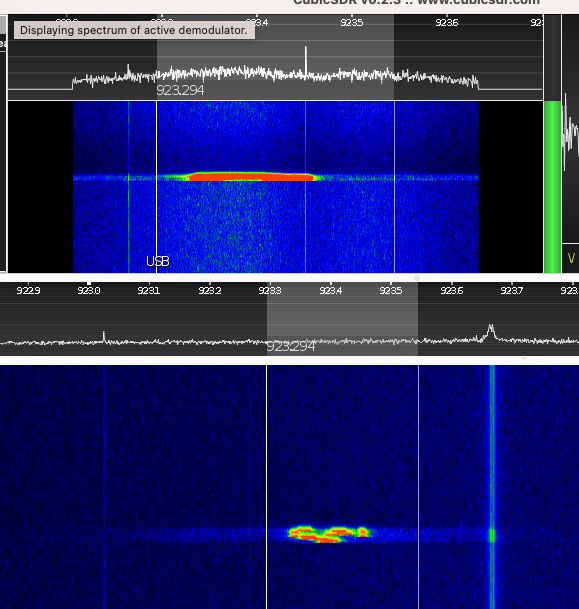
- How can we use Software Defined Radio (see below) to better analyse and understand the protocol and issues with a prototype.